Saddle stitching is the most common and cost-effective method for binding booklets. Though a saddle stitched booklet is an economical choice, it can easily possess a “WOW” factor through attractive design, vibrant color, and good paper choices. Adding coatings to the cover can also add a special touch. Saddle stitching is an excellent choice for binding magazines, catalogs, brochures, price lists, programs, wall calendars, newsletters, direct mailers, and more.
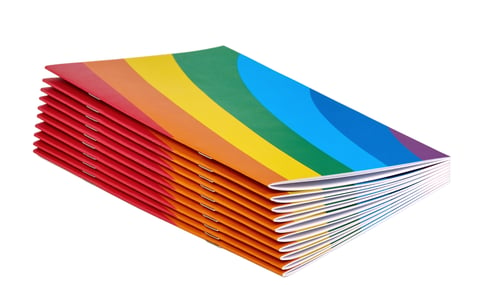
Saddle stitched booklets are quite versatile. They can be created in portrait, landscape, and square orientations. They can be small like a pocket guide or large like a road atlas. They accommodate crossover images spanning 2 pages with ease. Saddle stitched booklets can also be easily 3-hole drilled for inserting into 3-ring binders.
The number of pages suited for saddle stitching varies depending on the type and thickness of the paper used for the interior pages. For example, 60# gloss text is thin enough that you can comfortably saddle stitch up to 96 pages plus cover. Heavier and thicker paper will probably reduce the maximum number of pages ideally suited to saddle stitching. This is best discussed with your printer during the planning stages.
Self-Cover vs. Plus-Cover
Saddle-stitched booklets can be “self-cover” which means all pages are printed on the same weight and type of paper. “Plus-cover” indicates the cover will be on a different stock, typically heavier than the body pages of the booklet. Examples: If you have a booklet with 36 total pages and you don’t want the cover to be heavier, you tell your printer it is “36 pages self-cover.” If you want the cover pages to be heavier than the body or on a different stock, tell the printer the document is “32 pages plus-cover.”
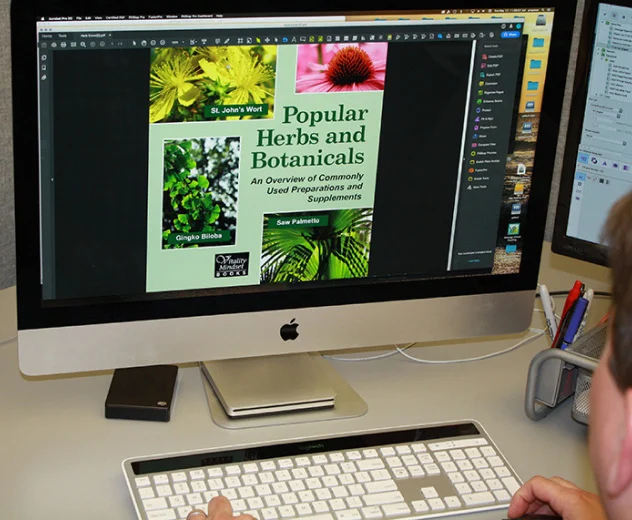
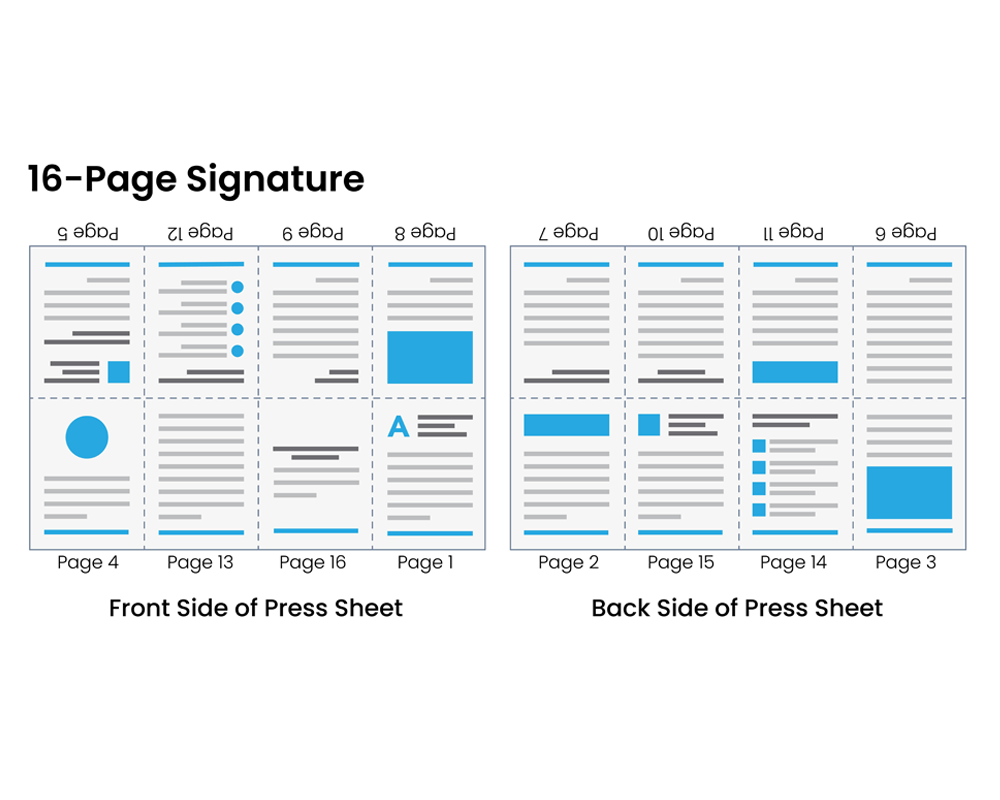
The following will discuss Printer’s signatures. If you’re not familiar with them, please check out our blog, What Are Printer’s Signatures?
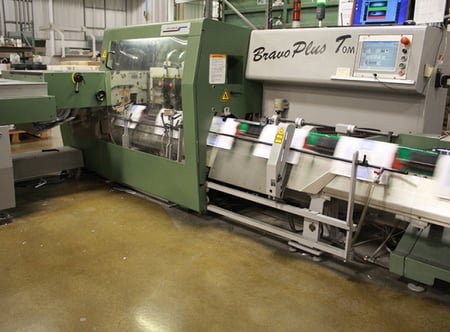
Shown here is a precision 8-pocket Müller-Martini Saddle Stitcher at Premier Print Group. This fully automated binder can gather, stitch, and trim up to a 96-page plus cover booklet at a size of 8.5” x 11”. It is equipped with signature recognition cameras, a feature that ensures signatures are in the correct position and none are missing or duplicated.
The Saddle Stitching Process
The first step is folding signatures, typically containing 4, 8, 12, 16, or 32 pages. These signatures are loaded into an appropriate pocket on the saddle stitcher. (See Photo 1 below). They are pulled into the machine from the bottom of the stack. Signatures are gathered together, nesting one inside the other, and are then bound through the fold line with wire staples. These staples enter through the folded spine and are clinched between the centermost pages.
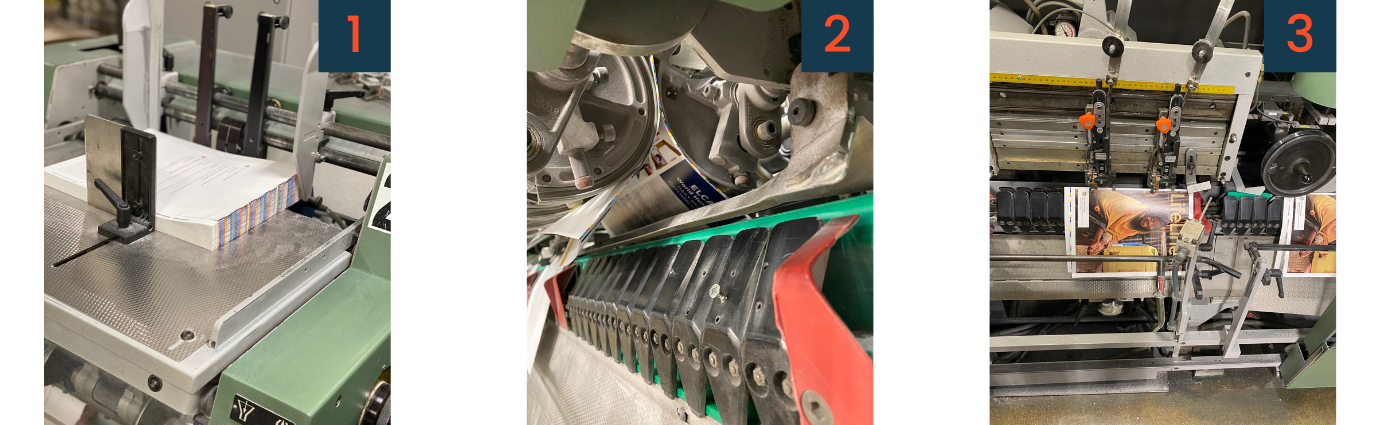
Signatures are dropped one upon another with the innermost signature being the first to drop onto the saddle. Photo 2 shows a signature being opened mechanically and preparing to drape down onto the saddle. Additional outer signatures fall onto the saddle with the cover being the last to be added. The booklet’s pages are now all nested together.
Precision stitcher heads then staple the nested signatures. (See Photo 3). The wire is fed into the heads from a coil, cut to exacting length depending on the thickness of the booklet, and then formed into staples. The wire legs of the staple must be long enough to bind securely when clenched, but not too long that they have an unsightly overlap in the centerspread.
After stitching, the booklet proceeds to a 3-knife trimmer. This operation removes all excess paper from the top, face, and bottom, leaving clean edges that give the booklet an attractive finished appearance.

As noted, a commercial printer’s saddle stitching equipment uses folded signatures. Having been folded on heavy-duty precision folders, the binding edge has tight folds that help the booklet lay flat after stitching and trimming. In contrast, copy shops and smaller print shops often use stitching equipment that staples all the sheets in their flat form and then folds all pages at once. This often results in the finished booklet having an unattractive rounded spine as opposed to the crisp spine produced on larger commercial equipment.
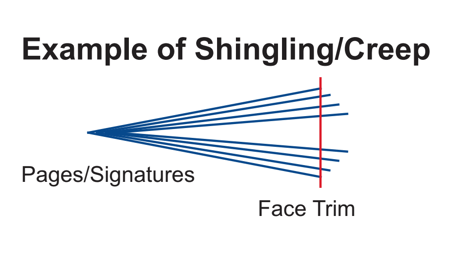
Another noteworthy factor to be aware of is shingling. Shingling, also known as creep, is an industry term regarding a phenomenon in bindery operations where paper thickness automatically pushes each subsequent 4 pages of the body away from the binding edge. If shingling/creep is not addressed, there is a risk of narrowed outer margins on the innermost pages of the publication and important copy being trimmed short.
Commercial printers process files using sophisticated software that automatically compensates for shingling by incrementally narrowing the width of pages ever so slightly toward the binding edge to compensate for the thickness of the paper being used. Designers usually don’t need to compensate for shingling/creep since reputable printers automatically address this issue.
Premier Print Group is dedicated to providing superior products and services. Our experts are always glad to assess your projects and determine the best printing and bindery methods to ensure the highest quality and your total satisfaction. Contact us and let’s start a conversation.